Qt教材筆記_part01_基礎控制項_Buttons_slot信號槽範例(拖動、打程式添加)

Qt專案新建方式
第一種Qt Widget


QPushButton使用(搭配QMessageBox)
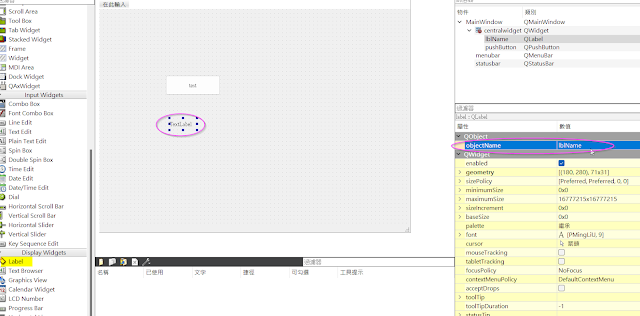
drag一個Push Button 可用變更文字來更改顯示文字為Test或其他內容
針對其右鍵則可添加信號槽進行event註冊


ui->setupUi(this)是由.ui文件生成的類的構造函數,這個函數的作用是對界面進行初始化,它按照我們在Qt設計器裡設計的樣子把窗體畫出來,把我們在Qt設計器裡面定義的信號和槽建立起來。
這邊要注意一定要放在最上面不可以把ui->setupUi(this)這行代碼寫在了最後底部。
不然會出現提示內存洩漏問題。
Qt在ui->setupUi(this)中對控制項進行內存分配
只有分配了內存,才能使用諸多控制項,所以說一定要把ui->setupUi(this)這行代碼放在函數一開始的位置。

Ctrl+A 再 Ctrl+i可自動format好程式碼喔!!

再使用QDebug時候記得引入相應header喔
另外內建的Qt header可用雙引或是尖括號(推薦)
透過按鈕來更新Label

完整範例程式碼
mainwindow.h(QPushButton+QLabel+QMessageBox)
1 2 3 4 5 6 7 8 9 10 11 12 13 14 15 16 17 18 19 20 21 22 23 24 | #ifndef MAINWINDOW_H #define MAINWINDOW_H #include <QMainWindow> QT_BEGIN_NAMESPACE namespace Ui { class MainWindow; } QT_END_NAMESPACE class MainWindow : public QMainWindow { Q_OBJECT public: MainWindow(QWidget *parent = nullptr); ~MainWindow(); private slots: void on_pushButton_clicked(); private: Ui::MainWindow *ui; }; #endif // MAINWINDOW_H |
mainwindow.cpp(QPushButton+QLabel+QMessageBox)
1 2 3 4 5 6 7 8 9 10 11 12 13 14 15 16 17 18 19 20 21 22 23 24 25 26 27 28 29 30 31 32 33 34 35 | #include "mainwindow.h" #include "ui_mainwindow.h" #include <QMessageBox> #include <QDebug> MainWindow::MainWindow(QWidget *parent) : QMainWindow(parent) , ui(new Ui::MainWindow) { ui->setupUi(this); } MainWindow::~MainWindow() { delete ui; } void MainWindow::on_pushButton_clicked() { //QMessageBox::about(this,"about title","button is clicked"); /* QMessageBox::StandardButton reply = QMessageBox::question(this, "My Title", "This is my custom message", QMessageBox::Yes | QMessageBox::No); if(reply == QMessageBox::Yes) { QApplication::quit(); } else { qDebug() << "No is clicked"; }*/ ui->lblName->setText("Btn is clicked! 按鈕被點了"); } |
第二種Empty qmake Project


預設是空蕩蕩捨麼都沒有的狀況


要自己到.pro專案檔案內去設置連結(要自己手KEY或複製這兩行喔)


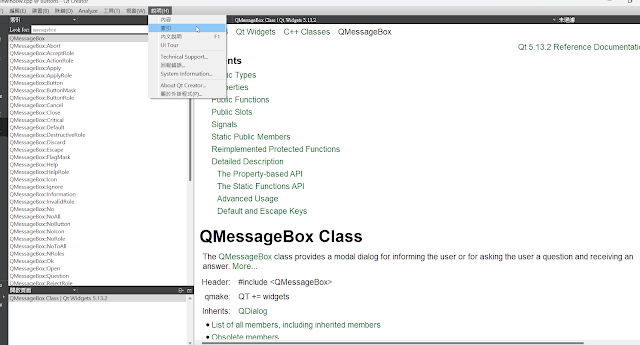
QFontDialog使用

QColorDialog使用

完整範例程式碼main.cpp (QColorDialog+QFontDialog+Empty qmake Project)
1 2 3 4 5 6 7 8 9 10 11 12 13 14 15 16 17 18 19 20 21 22 23 24 25 26 27 28 29 30 31 32 33 34 35 36 37 38 39 40 41 42 43 44 45 46 47 48 49 50 51 52 53 54 55 56 | #include <QApplication> #include <QLabel> #include <QWidget> #include <QDebug> #include <QFontDialog> #include <QColorDialog> class QFontDialogTester : public QWidget { public: void onFont() { bool ok; QFont font = QFontDialog::getFont( &ok, QFont( "Arial", 18 ), this, tr("Pick a font") ); if( ok ) { qDebug() << "font : " << font; qDebug() << "font weight : " << font.weight(); qDebug() << "font family : " << font.family(); qDebug() << "font style : " << font.style(); // StyleNormal = 0, StyleItalic = 1, StyleOblique = 2 qDebug() << "font pointSize : " << font.pointSize(); } } }; class QColorDialogTester : public QWidget { public: void onColor() { QColor color = QColorDialog::getColor(Qt::yellow, this ); if( color.isValid() ) { qDebug() << "Color Choosen : " << color.name(); } } }; int main(int argc, char *argv[ ]) { QApplication app(argc, argv); /*QLabel hello("Hello World"); hello.setWindowTitle("My First Qt Program"); hello.resize(400, 400); hello.show();*/ /*QFontDialogTester font_test; font_test.onFont();*/ QColorDialogTester color_test; color_test.onColor(); return app.exec(); } |
如果是寫一個按鈕信號槽機制呢?
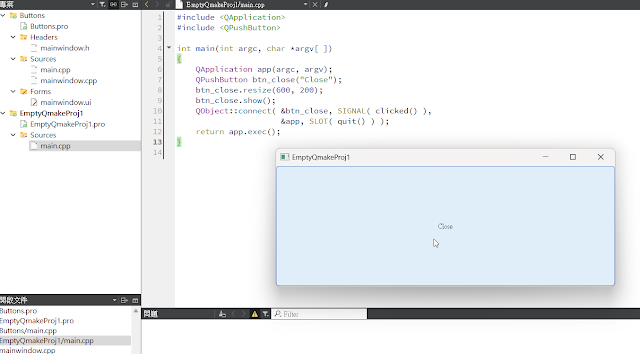
main.cpp(slot)
1 2 3 4 5 6 7 8 9 10 11 12 13 | #include <QApplication> #include <QPushButton> int main(int argc, char *argv[ ]) { QApplication app(argc, argv); QPushButton btn_close("Close"); btn_close.resize(600, 200); btn_close.show(); QObject::connect( &btn_close, SIGNAL( clicked() ), &app, SLOT( quit() ) ); return app.exec(); } |
QLabel跟QPushButton使用補充
新建好一個Widget專案後拖曳按鈕與label
分別添加"clicked()"和"pressed()"
clicked() ->點擊事件
pressed() ->按下事件
在mainwindow.cpp中編寫兩個回調函數, 此處使用 qDebug(" "); 在控制檯輸出字符.


Pressed: event is generated when you push down the mouse button
Clicked: event is generated when a mouse button Pressed & Released.
Qt的事件可能容易和信號混為一談
信號是由Qt物件發出,是一個函數。
事件可能來自於外部,也可能是內部的對像生成,是一個QEvent物件
但通常事件往往是信號的誘因。比方使用者點擊一個QPushButton按鈕,這個時候點擊操作是一個事件,按鈕在收到點擊事件後會發出一個onClicked的信號。這就導致了在Qt中,我們很多時候使用一個控件不需要去關心事件,而只需要去關心控件的信號就可以了。
Ref:
https://www.twblogs.net/a/5c84f78bbd9eee35fc1404a6
https://www.cnblogs.com/Manual-Linux/p/11490614.html
https://www.cnblogs.com/codegb/p/16653442.html
https://xyz1001.xyz/articles/11422.html
https://www.electroniclinic.com/tag/qt/
https://www2.cs.uic.edu/~i340/qt/QT_Designer_Tutorial/
https://zetcode.com/gui/qt5/widgets/
https://chenglearning.blogspot.com/2013/11/qt2qcheckbox.html


留言
張貼留言