Blazor第3天_Blazor_元件的處理part1.(跨元件存取,跨元件傳參,路由傳參)
在前幾篇我們已經知道
Blazor Server主要透過SignalR來做Server跟Client端的效果連動

以下相關操作(不管是Blazor Server或者Blazor WASM都通用)
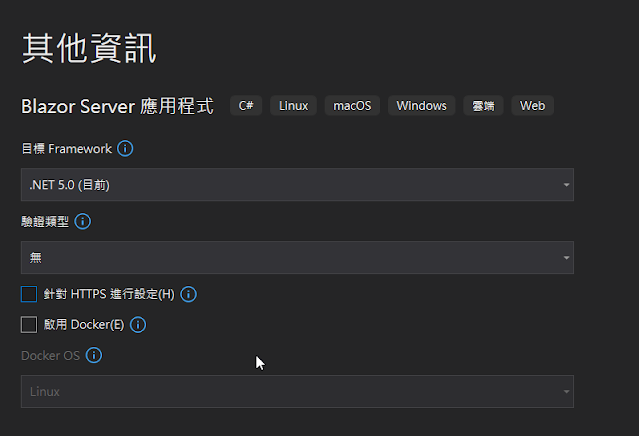
新建好一個 Blazor Server專案


新建一個Blazor Component
對Pages目錄右鍵選新增Razor元件


開始編輯
~\Pages\MyFirstComponent.razor
1 2 3 4 5 6 7 8 9 | @page "/mfc" <div style="background-color:green"> <h3>My First Component</h3> <p>This is my first component</p> </div> @code { } |
訪問自訂元件
再次執行我們的Blazor應用
並設定 /mfc路由即可成功訪問到我們自訂的元件

自訂元件B(子元件)包覆於自訂元件A(母元件)的情況
通常可能會在專案分門別類放置專門一個存放元件的目錄
這裡我命名Controls並新建第二個元件

~\Controls\MySecondComponent.razor
1 2 3 4 5 6 7 | <div style="background-color:yellow"> <h3>My Second Component</h3> <p>This is my Second component</p> </div> @code { } |
通常我們若想要直接在FirstComponent中存取SecondComponent
可以直接透過元件名稱類似html tag方式直接存取
~\Pages\MyFirstComponent.razor
1 2 3 4 5 6 7 8 9 10 | @page "/mfc" <div style="background-color:green"> <h3>My First Component</h3> <MyBlazorServerApp1.Controls.MySecondComponent></MyBlazorServerApp1.Controls.MySecondComponent> <p>This is my first component</p> </div> @code { } |

但在寫的時候若不想連完整的namespace (MyBlazorServerApp1.Controls)
一起寫
則可到_Imports.razor
補using該命名空間進來

父子元件傳參
通常會需要處理到從Parent元件(MyFirstComponent)
傳到Child元件(MySecondComponent)的程式邏輯操作
這裡我們在Child元件(MySecondComponent)
做屬性的添加(加在@code區塊)
Child Component
~\Controls\MySecondComponent.razor
1 2 3 4 5 6 7 8 9 | <div style="background-color:yellow"> <h3>My Second(Child) Component</h3> <p>This is my Child component</p> <h4>@Title</h4> </div> @code { [Parameter] public string Title { get; set; } } |
這邊要注意[Parameter]的標記一定要加

Parent Component
~\Pages\MyFirstComponent.razor
1 2 3 4 5 6 7 8 9 10 | @page "/mfc" <div style="background-color:green"> <h3>My First(Parent) Component</h3> <MySecondComponent Title="Pass value from parent to child"></MySecondComponent> <p>This is my Parent component</p> </div> @code { } |

Route傳參
從特定Page元件傳送到另一個Page元件
以上面來看Page元件層級的
我們就以MyFirstComponent元件為例
Route傳參(單一個預設接收字串形式)
稍微修改多增加一個Info的屬性,並希望透過URL路由傳參。
1 2 3 4 5 6 7 8 9 10 11 12 | @page "/mfc/{Info}" <div style="background-color:green"> <h3>My First(Parent) Component</h3> <MySecondComponent Title="Pass value from parent to child"></MySecondComponent> <p>This is my Parent component</p> <p style="color:red">@Info</p> </div> @code { [Parameter] public string Info { get; set; } } |
當我們透過URL直接訪問沒有依照指定路由格式
預設就會報如下錯誤
Sorry, there's nothing at this address.

當我們傳一個字串即可訪問正常
http://localhost:22862/mfc/%E9%80%99%E6%98%AF%E8%B3%87%E8%A8%8A

Route傳參(多個不同型態的混合路由參數)
實務面經常也會遇到不同型別參數有要透過路由傳遞的情況
例如有文字的info資訊,還有整數的id流水號編碼(or 價格)要傳遞
1 2 3 4 5 6 7 8 9 10 11 12 13 14 15 | @page "/mfc/{Info}/{Id}"
<div style="background-color:green">
<h3>My First(Parent) Component</h3>
<MySecondComponent Title="Pass value from parent to child"></MySecondComponent>
<p>This is my Parent component</p>
<p style="color:red">@Info</p>
</div>
@code {
[Parameter]
public int Id { get; set; }
[Parameter]
public string Info { get; set; }
}
|
這時當我們依照路由指定形式去訪問
則會有如下錯誤
An unhandled exception occurred while processing the request.
InvalidCastException: Unable to cast object of type 'System.String' to type 'System.Int32'.

第一種修正方法
可以將id改成string
當然第二種就是
去路由定義好型別

即可正常訪問

有彈性的路由傳參設計
有時候不見得訪問的路由參數一定都會有值
所以可以多增加不只一種路由訪問規則
我們可以定義多行@page 的訪問路由規則
1 2 3 4 5 6 7 8 9 10 11 12 13 14 15 16 | @page "/mfc/{Info}/{Id:int}"
@page "/mfc"
<div style="background-color:green">
<h3>My First(Parent) Component</h3>
<MySecondComponent Title="Pass value from parent to child"></MySecondComponent>
<p>This is my Parent component</p>
<p style="color:red">@Info</p>
<p style="color:red">@Id</p>
</div>
@code {
[Parameter]
public int Id { get; set; }
[Parameter]
public string Info { get; set; }
}
|
此外會發現預設若Int路由參數沒有設定會是直接顯示0
而string則默認null就為空

此時可以將compnent初始化事件做覆寫
並調整int為可nullable的
當它們null沒有被賦予值就給默認值
1 2 3 4 5 6 7 8 9 10 11 12 13 14 15 16 17 18 19 20 21 22 23 | @page "/mfc/{Info}/{Id:int}"
@page "/mfc"
<div style="background-color:green">
<h3>My First(Parent) Component</h3>
<MySecondComponent Title="Pass value from parent to child"></MySecondComponent>
<p>This is my Parent component</p>
<p style="color:red">@Info</p>
<p style="color:red">@Id</p>
</div>
@code {
[Parameter]
public int? Id { get; set; }
[Parameter]
public string Info { get; set; }
protected override void OnInitialized()
{
base.OnInitialized();
Id = Id ?? 1;
Info = Info ?? "default value";
}
}
|

在Index預設首頁可添加兩個 href連結的a tag
指定訪問路由
1 2 3 4 5 6 7 8 | @page "/" <h1>Hello, world!</h1> Welcome to your new app. <a href="/mfc">My Page Component</a> <a href="/mfc/mytitle/50">My Page Component with parameters</a> <SurveyPrompt Title="How is Blazor working for you?" /> |


留言
張貼留言