Lab 08 - Manage Virtual Machines (Task1~Task4)在Azure Portal作業

Task 1: Deploy zone-resilient Azure virtual machines by using the Azure portal
you will deploy two Azure virtual machines into different availability zones by using the Azure portal. Availability zones offer the highest level of uptime SLA for virtual machines at 99.99%.
To achieve this SLA, you must deploy at least two virtual machines across different availability zones.


Search for and select Virtual machines, on the Virtual machines blade, click + Create, and then select in the drop-down Azure virtual machine. Notice your other choices.
On the Basics tab, in the Availability zone drop down menu, place a checkmark next to Zone 2. This should select both Zone 1 and Zone 2.

做lab發現有ZON不知問題就照他提示的替換。


completing the configuration:

Click Next: Disks > , specify the following settings (leave others with their default values):

這邊OS Disk Space可選到以下這些範圍


Key management

Click Next: Networking > take the defaults but do not provide a load balancer.

Click Next: Management > and specify the following settings (leave others with their default values):

Patch orchestration options 其實有這些選項


Task 2: Manage compute and storage scaling for virtual machines


In the Settings area, select Disks.

Under Data disks select + Create and attach a new disk. Configure the settings (leave other settings at their default values). Click Apply.


After the disk has been created, click Detach (if necessary, scroll to the right to view the detach icon), and then click Apply.

and then click Apply.


Search for and select Disks. From the list of disks, select the vm1-disk1 object.


Set the storage type to Standard SSD, and then click Save.
Navigate back to the az104-vm1 virtual machine and select Disks.

In the Data disk section, select Attach existing disks.
In the Disk name drop-down, select VM1-DISK1.

Select Apply to save your changes.


Task 3: Create and configure Azure Virtual Machine Scale Sets
In this task, you will deploy an Azure virtual machine scale set across availability zones. VM Scale Sets reduce the administrative overhead of automation by enabling you to configure metrics or conditions that allow the scale set to horizontally scale, scale in or scale out.
In the Azure portal, search for and select Virtual machine scale sets and, on the Virtual machine scale sets blade, click + Create.


Create a Virtual Machine Scale Set (VMSS)

Security type refers to the different security features available for a virtual machine.
Security features like Trusted launch and Confidential virtual machines help to improve the security of Azure generation 2 virtual machines. However, additional security features have some limitations, which include not supporting back up, managed disks, and ephemeral OS disks.


調整zone複選項目

Orchestration mode 分成
Flexible: achieve high availability at scale with identical or multiple virtual machine types
Uniform: optimized for large scale stateless workloads
On the Spot tab, accept the defaults and select Next: Disks >.

On the Disks tab, accept the default values and click Next : Networking >.

On the Networking page, select Edit virtual network link. Make a few changes. When finished, select OK.


In the Networking tab, click the Edit network interface icon to the right of the network interface entry.

On the Create network security group blade, specify the following settings (leave others with their default values):

Click Add an inbound rule and add an inbound security rule with the following settings (leave others with their default values):

Click Add and, back on the Create network security group blade, click OK.

In the Edit network interface blade, in the Public IP address section, click Enabled and click OK.

In the Networking tab, under the Load balancing section, specify the following (leave others with their default values).
On the Create a load balancer page, specify the load balancer name and take the defaults. Click Create when you are done then Next : Management >.

Note: Pause for a minute and review what you done. At this point, you have configured the virtual machine scale set with disks and networking. In the network configuration you have created a network security group and allowed HTTP. You have also created a load balancer with a public IP address.
On the Management tab, specify the following settings (leave others with their default values):

On the Health tab, review the default settings without making any changes and click Next : Advanced >.

On the Advanced tab, click Review + create.

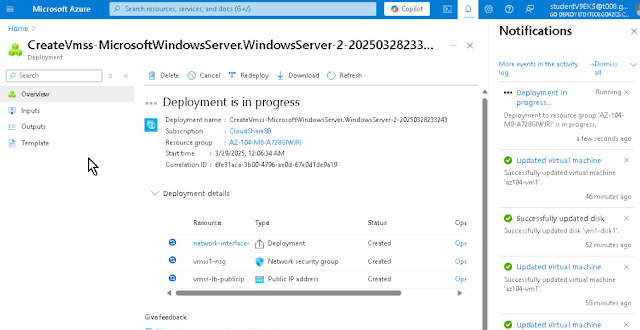
Note: Wait for the virtual machine scale set deployment to complete. This should take approximately 5 minutes.

Task 4: Scale Azure Virtual Machine Scale Sets
In this task, you scale the virtual machine scale set using a custom scale rule.

Choose Availability + Scale from the left side menu, then choose Scaling.
Scale out rule

You can Manual scale or Custom autoscale.
- In scale sets with a small number of VM instances, increasing or decreasing the instance count (Manual scale) may be best.
- In scale sets with a large number of VM instances, scaling based on metrics (Custom autoscale) may be more appropriate.
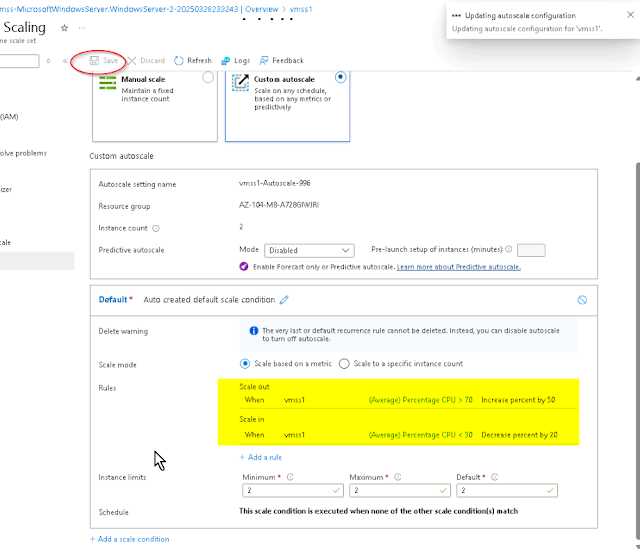
Select Custom autoscale. Then change the Scale mode to Scale based on metric.
And then select Add a rule.

Let's create a rule that automatically increases the number of VM instances. This rule scales out when the average CPU load is greater than 70% over a 10-minute period. When the rule triggers, the number of VM instances is increased by 50%.


Be sure to Add then Save your changes.

During evenings or weekends, demand may decrease so it is important to create a scale in rule.
Let's create a rule that decreases the number of VM instances in a scale set. The number of instances should decrease when the average CPU load drops below 30% over a 10-minute period. When the rule triggers, the number of VM instances is decreased by 20%.

Be sure to Save your changes.
Set the instance limits
When your autoscale rules are applied, instance limits make sure that you do not scale out beyond the maximum number of instances or scale in beyond the minimum number of instances.
Instance limits are shown on the Scaling page after the rules.


Note: If you are interested in using Azure PowerShell for virtual machine creation, try Task 5. If you are interested in using the CLI to create virtual machines, try Task 6.
Learn more with self-paced training Ref:
Create a Windows virtual machine in Azure. Create a Windows virtual machine using the Azure portal. Connect to a running Windows virtual machine using Remote Desktop
Build a scalable application with Virtual Machine Scale Sets. Enable your application to automatically adjust to changes in load while minimizing costs with Virtual Machine Scale Sets.
Connect to virtual machines through the Azure portal by using Azure Bastion. Deploy Azure Bastion to securely connect to Azure virtual machines directly within the Azure portal to effectively replace an existing jumpbox solution, monitor remote sessions by using diagnostic logs, and manage remote sessions by disconnecting a user session.
Create a virtual machine in the portal.
Deploy a virtual machine with a template.
Create a virtual machine with PowerShell
Create a virtual machine with the CLI.


留言
張貼留言